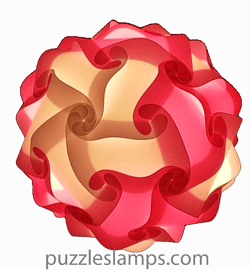
Manual Instructions How to assemble PuzzlesLamps
Below there are Step-By-Step tips, graphics and descriptions on how to start assembling Puzzles Lamps.
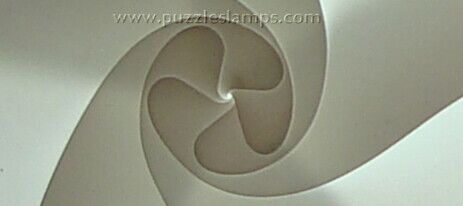
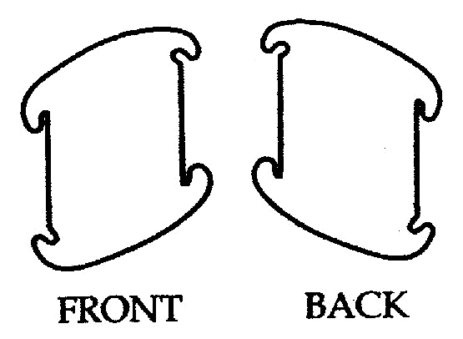
Puzzles Lamps Components Front and Back
All Puzzles Lamps components are identical.
Each component has front and back side. Standard Puzzles Lamps, as well as many others designs, are assembled using only the front side.
Each component has two curved and two straight edges.
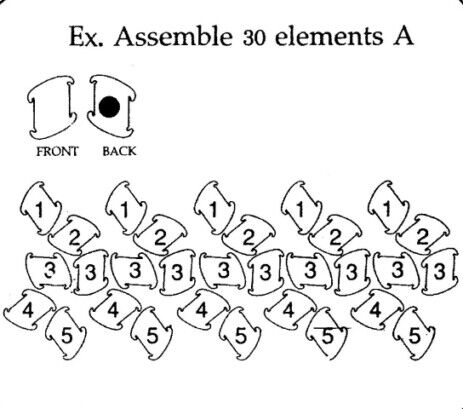
Standard Round Puzzles Lamps Diagram of 30 components
Step-by-Step Instructions on how to assemble Standard Round Puzzles Lamps with 30 components
The diagram shows 4 rows of 5 components and the middle row made with 10 components. Start to assemble the first 5 components of the first row by following the next step.
Let's start assembling the first rosette with 5 components!
1st row: 5 components
2nd row: 5 components
3rd row: 10 components
4th row: 5 components
2nd row: 5 components
3rd row: 10 components
4th row: 5 components
5th row: 5 components
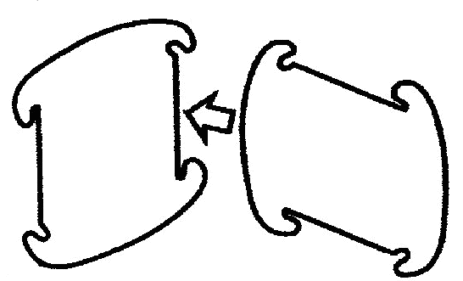
Linking Puzzles Lamps Components
A curved edge is ALWAYS placed over the straight edge of another component.
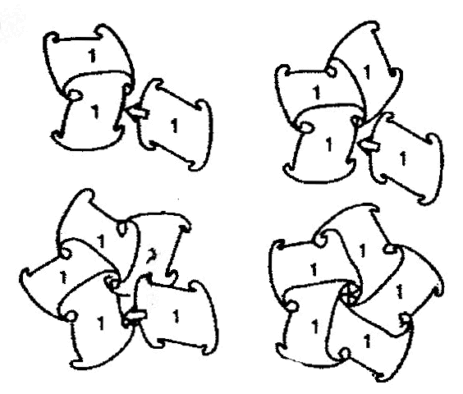
5 Components linked to create a Rosette
Follow the steps from the image to assemble the first rosette with 5 components
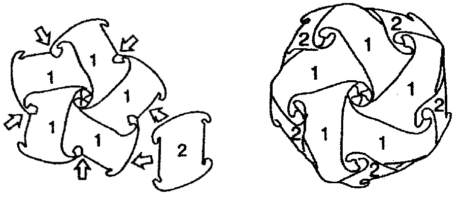
Linking the second row to the first rosette
5 components of the 2nd row are attached one by one around the first rosette.
Turn the formed 2 rows upside-down, so it sits on the table like a bowl. Check that all hooks are joined correctly.
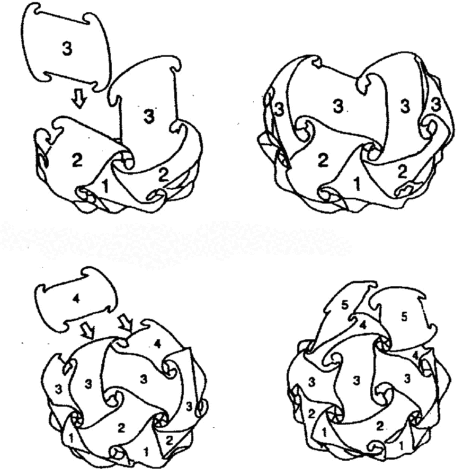
Closing Standard Round Puzzles Lamps
Keep joining the others components in the same way until the round lampshade is complete with 30 components.
4th row narrows the sphere and the 5h row closes the rounded puzzles lamp.
When the lamp is composed, check that all curved edges cover all the straight edges. Check each row and if a mistake has occurred, first check that all front of the components are placed outward. It might be easier if you mark front or the back side of the components, so they can be easily distinguished.
Lighting up Puzzles Lamps - Cable Installation
Once any lampshade has been assembled, there are several ways to light it up.
An easy alternative to enlight the Puzzles Lamps is with battery power LED spot light, in particular when no electicity is avalable. Puzzles Lamps can also be lighted up with LED String lights or with a regular ceiling cable lampholder.

Puzzles Lamps Cable Installation
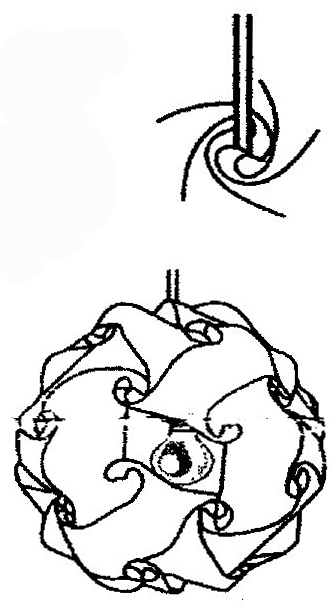
The Standard Round Puzzles lamps has 12 joints with 5 hooks each, and 20 joints with 3 hooks each. Loose 2 of the 5 hooks and squeeze through the cable and place the light bulb in the middle of the lamp. Close the hooks around the cable.
To check the position of the light bulb, you can unhook/open a component io the side of the lamp.
Please note that is preferable to use only LED light bulbs. Do not use regular light bulbs in particular with small size lampshade where the components may touch the lamp bulbs.
Watch this video to see Step-by-Step instructions to assemble Standard Round Puzzles Lamps
Buy online our Puzzles Lamps and start the fun!
Click on the following links to choose sizes and quantities of your prefered design.
